
Miss the Point
Miss the Point - design recap & postmortem

First things first,
I got 4th place in the Jam by judges votes,
and 3rd place by jammer votes.
I’m very happy with that result :D Woohoo!
and the Jam was awesome, I enjoyed it very much.
If you haven’t played the game yet, I highly recommend to do so before you read this post.
It’s a short game that usually takes only ~15 minutes to finish and is much more enjoyable without the spoilers in this post.
Play Miss the Point here
Okay with that out of the way, let’s get started.
I already spoke about my experience during the Jam in my first devlog.
Now I want to go into more detail, explaining my goals, my design process, the challenges I faced, and the things that went right and wrong.
So grab yourself a drink and/or snack and let’s get started.
Goal
As stated in my first devlog, my initial goal was simply to make a Platformer with escalating difficulty. From that evolved over time the design goal to make the game difficult but motivating
The dev of Galactic Evader hit the nail on the head, this describes exactly the experience I wanted the player to have.
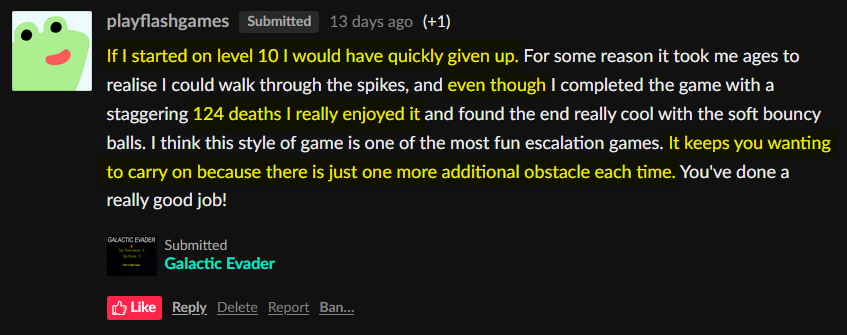 …not the walking through spikes part, but we talk about that later.
Design
How did I tackle making Miss the Point a difficult but motivating game?
Making things difficult is easy, making things motivating not so much, especially if the thing is difficult.
To begin, and before I lose myself and you in the details xD
I want to give a quick overview over all the things I did to motivate the player to keep on going.
- Quickly getting the player back into the game to try again, no time to think about giving up.
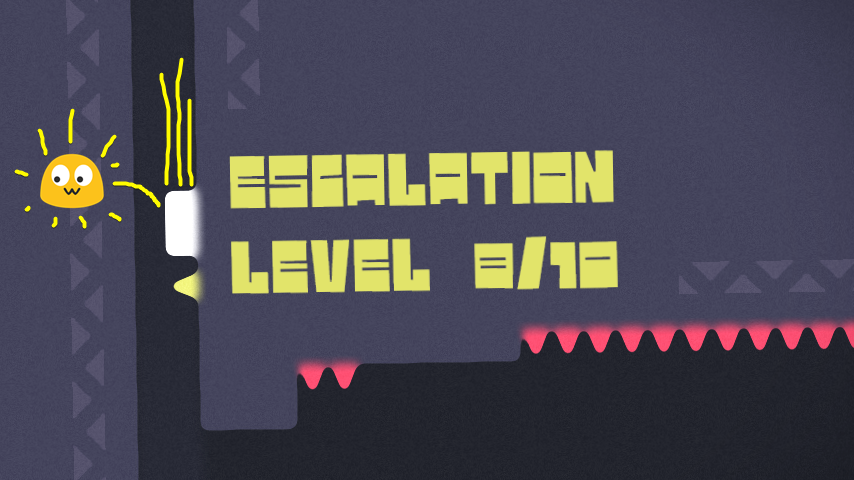
- The player can always see the level they are on and how many level are still left, this becomes especially important in the last couple level.
- The game is short.
- Slow escalation in difficulty at first, then only 2-3 quick level with the hardest difficulty.
- When designing the level I made sure that the player knows that they can overcome the hardest level because they had overcome each individual obstacle in previous level.
- Showing the player exactly why they died ( freeze frame with a highlight on the spike that the player hit ).
- Showing the death counter only during death.
- Music that is happy and energetic but not aggressive or annoying.
- Satisfying sound for success, and as feedback for player actions, which is important to acknowledge the players actions, but also gives the player some fun noises to play around with to relief stress and frustration.
Okay now lets get into the details of level design.
Right from the start the idea that the level would escalate in difficulty informed my decision to make the level geometry stay the exact same on every level to make the escalation obvious to the player.
If I would have made completely different level geometry and placed hazards in different locations for each level, then the increase in difficulty would have been much more subjective.
Some would have thought of level X as the most difficult one, others of level Y.
The spikes came about because it’s a classic Platformer hazard that is easy to implement.
When I first added them I still thought I would add a bunch of other hazards, but I ended up liking the simplicity of restricting myself to spikes only.
In the first step of designing all the level for the game I created the level geometry, at this stage I was mostly concerned with teaching the player the basics.
So right from the start I drop the player down a long tube to teach them that there is no fall damage to worry about.
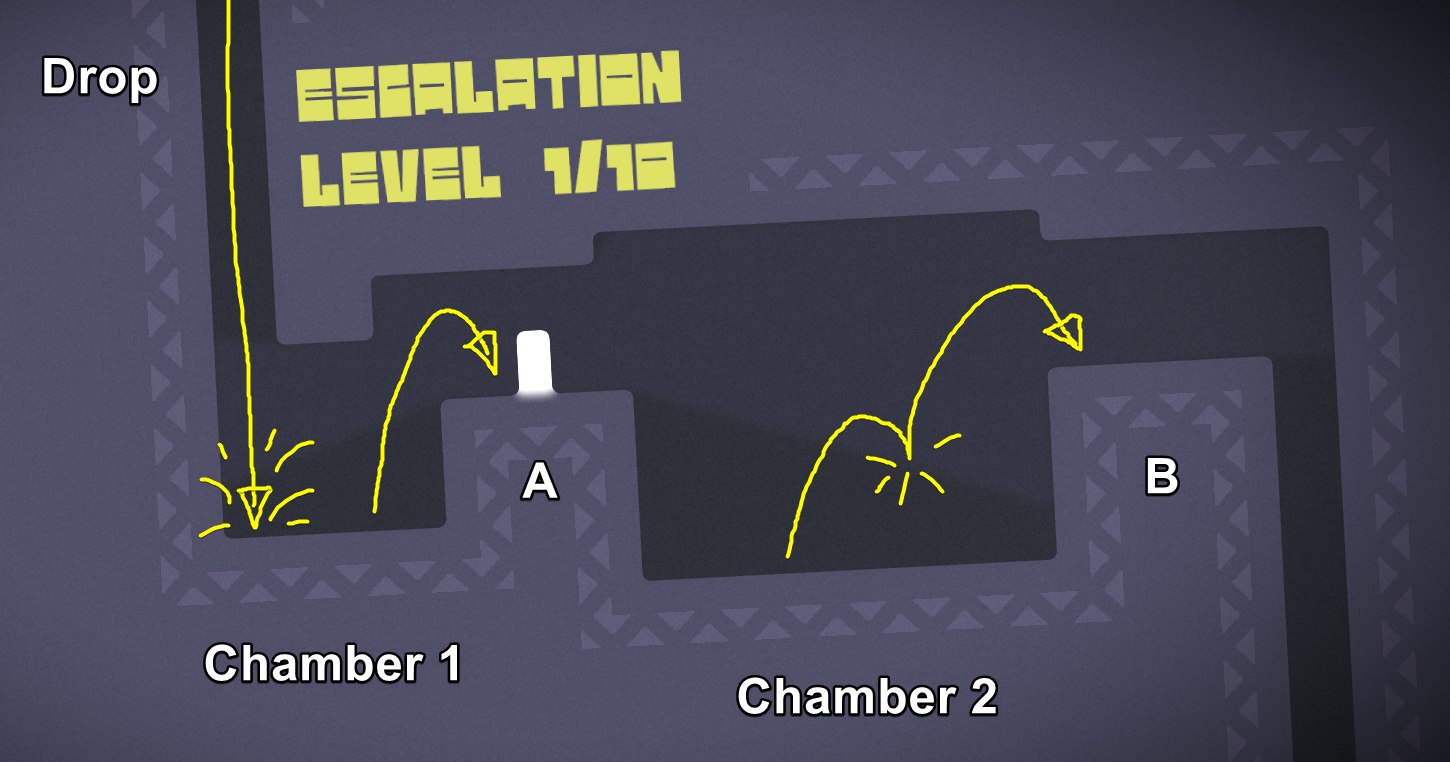
When they land in level 1/10 there are no threats anywhere so that the player has all the time they need to figure out the controls to move around. To get over obstacle A they need to figure out the jump button, to get over obstacle B they need to figure out that they have double jump.
So after the first level, without realizing it, the player already learned that they don’t take fall damage, they know how to move, they know how to jump and that they can double jump, simply by giving them time and space to discover all this themselves …plus throwing them down a deep hole :D
To design the rest of the level I worked backwards. First I made the hardest level that I could still beat after a lot of tries, then I designed level that would teach the player everything they need to successfully beat that last level. Lots of playtesting was crucial here.
In level 2/10 I introduce the first spike hazard and secretly hope that the player falls onto the spike here right away muahahaha.
But it’s okay if they don’t, there are still plenty of opportunities for the player to learn about their prickly properties >:P

Obviously a bunch of players actually did fall on the spike and learned that they are a hazard, but the players that didn’t had a bunch of different reactions to the spike.
Some players didn’t care about it at all and kept going to the next level, others got curious and investigated.
Some jumped onto it, others walked through it, and some did both.
This meant that from this point forward the state of knowledge was different for each player, but like I joked earlier, there were still plenty of opportunities to learn ahead of them, so I wasn’t worried about it.
The jump over Chamber 2 is basically the end boss of the game and it becomes progressively harder. From the start there are 3 ways to get over Chamber 2.
- #1 jump off of obstacle A, bump your head on the ceiling, do a 2nd jump and land on obstacle B
- #2 is kind of a trick jump where you against your intuition don’t jump off of obstacle A and fall down into Chamber 2 hitting the jump button shortly before hitting the ground, landing on obstacle B.
- #3 is the easiest, you simply drop down on the floor of Chamber 2, walk over to obstacle B and double jump up onto it.
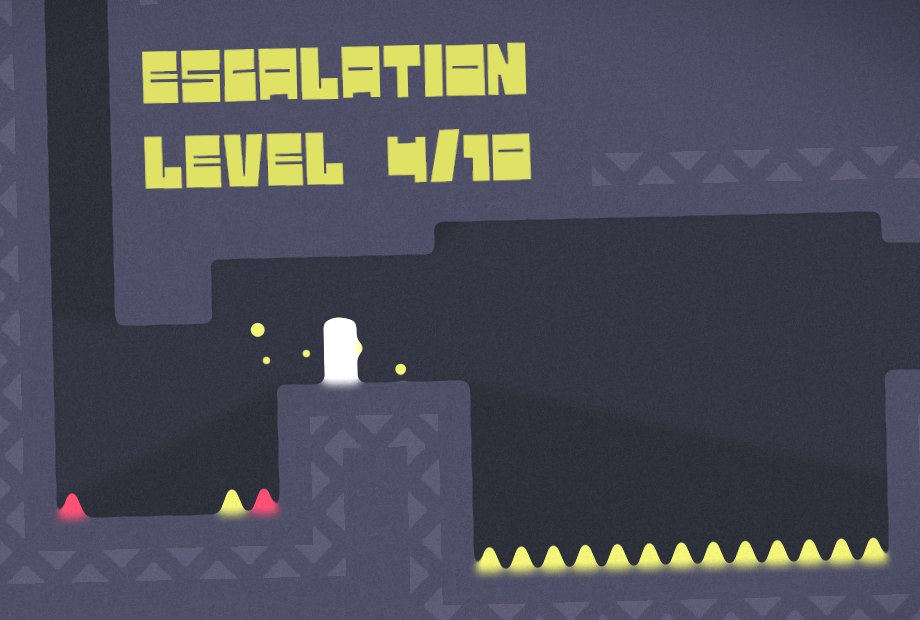
Since the game is about escalating difficulty, number 3, the easiest solution, has to go first. That happens here in level 4/10, by putting spikes all along the floor of Chamber 2.
 At this point the player is left with 2 possible solutions.
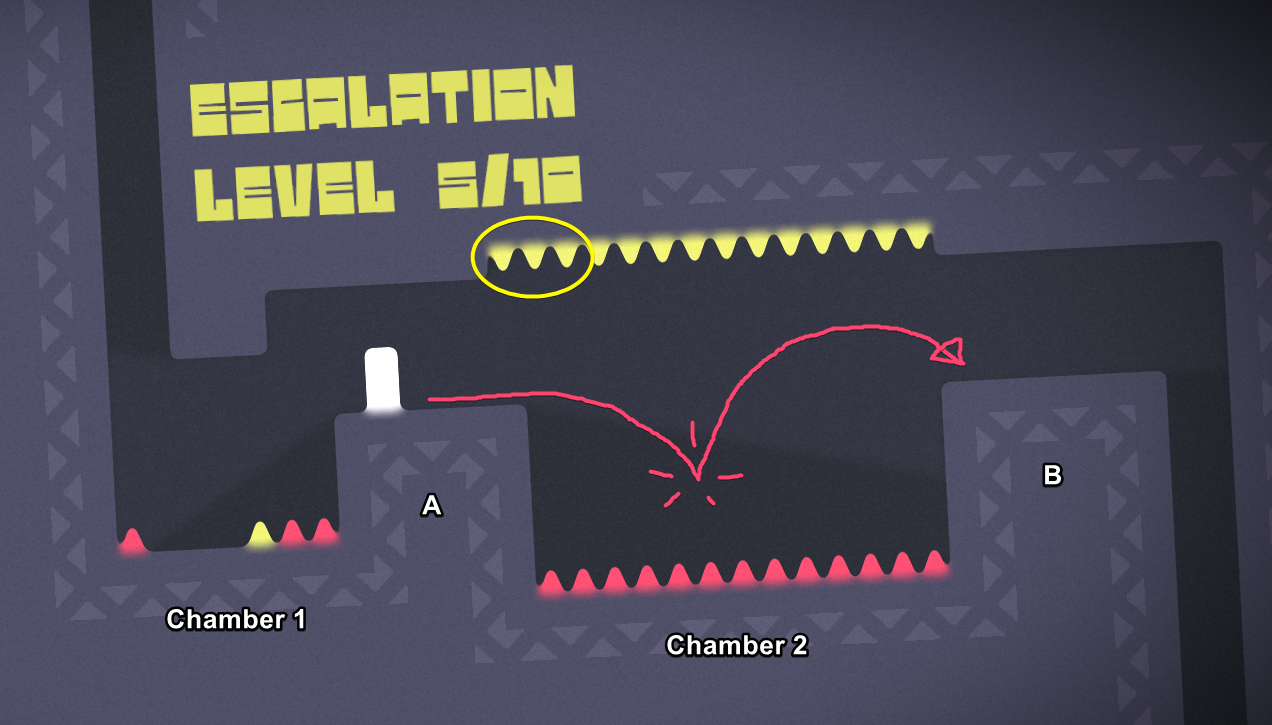
In 5/10 I take away another option, leaving the player with only one choice,
to discover the rather unintuitive trick jump of intentionally falling, instead of jumping, off of obstacle A.
 This is a critical level and I went through a couple iterations before landing on this design.
In a previous iteration I wanted to introducing the ceiling spikes more gradually and added only the first 3 spikes (the ones circled in yellow), but playtesting showed that this was a mistake.
Some players that got over Chamber 2 by bumping their head into the ceiling in the last level, now tried to do the same jump here.
In hindsight this is obvious,
they might just learned in the previous level to avoid the floor spikes with the head bump jump, and now they obviously try it again, and because there are just 3 spikes they think it’s the right solution, the jump is just really difficult.
So I took that level out and spawned all ceiling spikes at once instead.
Now it was very obvious that the head bump jump is no longer possible, and instead of getting frustrated by trying to do an impossible jump over and over again, the player now tried to find an entirely different solution to the problem.
And since there are not many options left, the players will eventually figure out the trick jump on their own. Which is very important, because that’s the part that feels good, that’s where the fun is.
Another change for this crucial level was its placement in the progression.
In previous iterations I waited much longer to introduce those ceiling spikes, my reasoning was that it’s pretty difficult to get the timing right on that jump (it was even harder in earlier versions) so by introducing it late, the player would have to pull that jump off only twice.
So it was a noble cause :D
But again, through playtesting I was made aware of my flawed logic.
It was way too much at once. The difficult part later in the game, where you die over and over again right at the start, just to get a single attempt at the Chamber 2 jump, meant that the player had to figure out this unintuitive trick jump during the most challenging part of the game. Which was obviously not ideal.
So I put this challenge into an earlier level.
Even though the player now had to do the tricky jump more often, it was still way less frustrating because the challenge stand on its own.
Level 8/10 is where I’m sure that I will get every player on their first play through, even if they through some kind of miracle survived all previous level without dying once, here is where their luck ends.
 In all the previous level dropping down the tube, sliding along the right side of the wall was 100% safe, and now, all of a sudden, there is a spike in the way.
This spike represents a switch from teacher, into challenge mode.
The gloves are off now, no more rules, for the last 3 level it’s bare knuckle fighting >:@
In the last levels it’s all about the wall spikes in the drop down tube.
Your timing needs to be impeccable to wiggle your way through those spikes and land perfectly in between the spikes on the bottom.
Getting this right is probably more of a lucky hit then actual skill for most people, it certainly is for me, but keeping your cool once you did hit it is definitively a skill.
 …a skill that I don’t have Dx
If you are like me and don’t keep your cool, then the jump over Chamber 2, which you have done a bunch of times in previous levels, suddenly becomes much harder to pull off, even though it is the exact same jump.
Those last level are just a total mind game
For the ending I wanted to add some kind of reward for the player instead of simply displaying a message and the death count. So I came up with this ball pit ending which worked out great in my opinion.
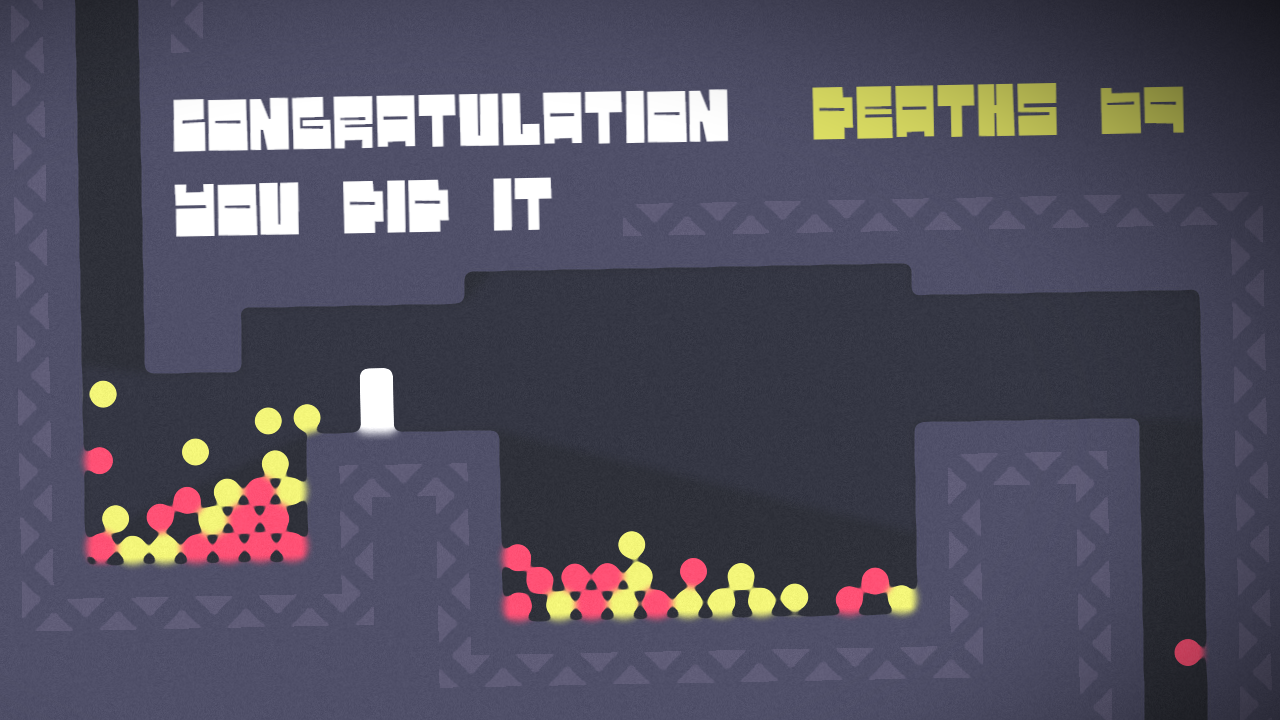 Something that not many noticed, but I find really cool, is the transition from spikes to balls that I made.
Thanks to the visual effect I use for the game, fading the spikes out, while also fading the balls in, results in this blend effect where it looks like the spike morphs into a ball that then drips off the wall or ceiling.
So that’s it, this concludes the design recap.
Those are most of the design decisions I made that I can recall.
Next I write a bit about some technical challenges and after that some thoughts about the things that went right and wrong for me in the Jam
Challenges
My first technical challenge actually turned into a strength.
Early on I was trying to get a visual style going, first I thought about using
a nice and clean Y2K aesthetic that I had developed some time ago.
But #1 I was not sure that’s okay based on the Jam rules, and #2 that style is not easy to pull off and work with.
So I thought I would try a really clean minimal style and started with a nice color palette. I added some noise to give it all some texture, and then tilted the whole game a bit to make it less boring.
But OH NO! What is that? Aliasing artifacts everywhere, turns out that the edges on any graphic element that is cut off by the bounding box shows jagged aliasing artifacts when the game is on an angle D:
That doesn’t look clean at all, minimal yea, but not clean. And it’s also really distracting with the constant shimmering of the edges :(
Unfortunately there is really no good way to get rid of this in Construct 3.
For stand alone sprites that don’t need to be stretched, like the player for example, you can leave a transparent 1 pixel border around the sprite to get correct AA ( Anti-Aliasing ) applied to it, but you don’t have that option for everything, in my case the environment.
If you use a sprite that you stretch to create the level geometry, then the edges become blurry if you put that 1 pixel border around it.
TiledBackground has the same aliasing issues on the edges, as well as TileMaps.
So I was about to ditch the whole tilting of the game idea again an move on, but then I thought I might be able to get rid of the aliasing issue by blurring everything just a bit, so I put horizontal/vertical blur on the layer and set it to 10% blur, 20% blur, 30% …etc.
It didn’t work, the blur effect doesn’t really blur more or less, it just gets mixed in more with higher %, so all I got with low % blur was some weird soft haze effect around edges.
But then I remembered the AlphaClamp effect and how it creates a hard edge based on the alpha channel. I thought that should probably work and solve my problem.
So I set the blur back to 100% and added the AlphaClamp effect, and it did actually work, no more aliasing artifacts
( After I replaced the AlphaClmap fx with AlphaRamp fx )
Now I had nice clean edges. But that effect stack had other “issues” that I didn’t like at first.
The rounded corners, and especially the spikes being rounded off irritated me. I was trying to get a simple clean look after all.
But it grew on me pretty quickly and I was really happy with the new look :)
The biggest technical challenge was still waiting for me at the end of the project however.
It is something no one noticed, and exactly that was the hard part about it.
The whole game is just a single level and the player seamlessly teleports from falling down the right tube, back to falling down the left tube.
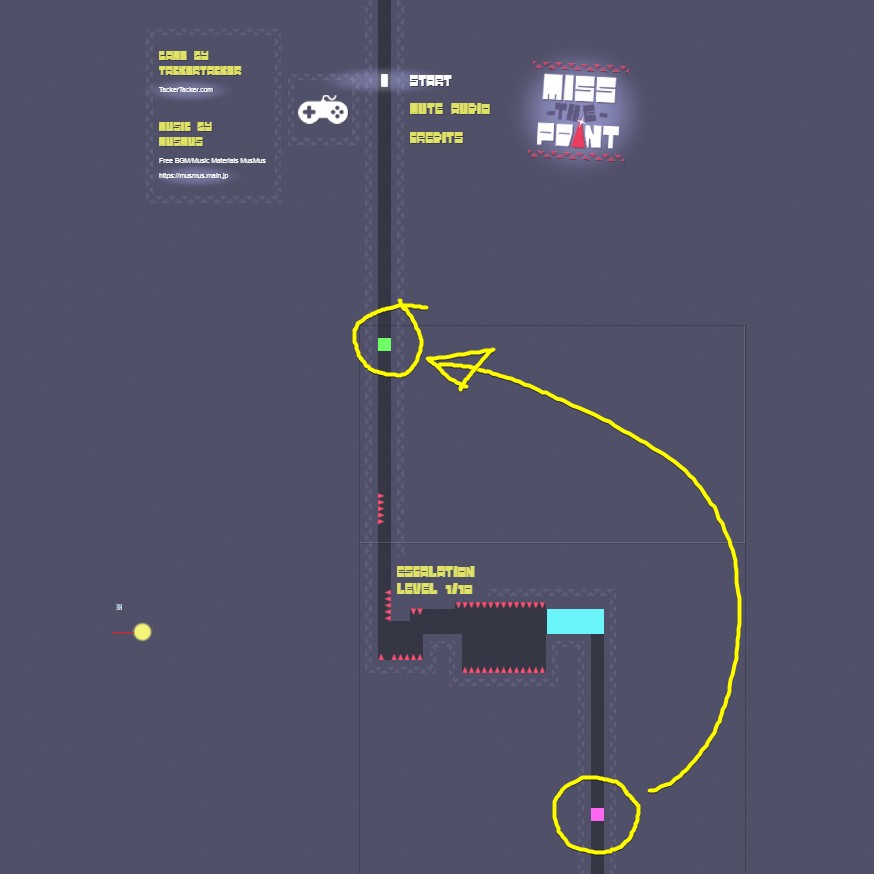 This was a bit tricky to setup at first, lining it up with the decorative elements along the edges of the level, making sure it was all seamless. But that was still relatively simple.
The real challenge were the reward balls at the end of the game, making them loop was not as straight forward as you might think.
Just teleport them like you do with the player, simple right?! Wrong!
The problem is that when the player gets teleported, the camera follows.
So if the player teleports and there is a ball following behind them, then the player will teleport away before the ball hits the teleport trigger and thus, from the point of view of the player, the ball disappears and then suddenly reappears once the ball also hit the trigger.
The same is true the other way around, if a ball hits the trigger first then it disappears before the player hits the trigger and reappears after the player teleported.
At first I was trying to teleport the balls that are in a drop tunnel always together with the player, based on some conditions. But nothing really worked out and in the end I found a pretty simple solution ( in hindsight ).
I just added 2 imposter balls at a fixed offset to each physics ball and disabled their collision.
This way no matter if the ball was in front or behind the player while falling down the tube, visually there was always either the real ball or 1 of the 2 imposters in view.
Here is a GIF of how that looks with a zoomed out camera, seeing it in action probably explains it the best.

Things that went right
- small scope, which meant I had much more time for play testing, optimizing, polishing, and finishing.
- I actually designed for the Jam instead of treating it like a full game. This meant I could aim for a ~15 minute play time, so that anyone checking the game out could finish it and actually get a satisfying ending to the experience, instead of just stop playing after a while after they get bored.
- Playtesting!
Playtesting made the game so much better, I’ve never done it before in a Jam, but I’m very glad I did because I learned so much from it.
I had the basic gameplay done in a day, first when things were still rough I just play tested myself, but soon I gave others the game to test it.
C3’s remote preview is such an amazing feature for this, one click and you have a link to your latest version to share and then watch a live video of them playing, without any kind of complicated setup on my end or theirs.
Watching other people play, especially for the first time, is so important to learn about your game and how people interact with it.
When you share your game this way and let people play test you should do it one by one. This way you can actually watch every single run instead of everyone playing at the same time.
Also don’t let all your friends play the first version, watch one play the current version, learn from it, implement improvements based on what you learned and only then ask the next person to play.
The first run is special, you learn the most from that, in later runs they already know what to expect.
Things that went wrong
I mentioned it in my first devlog, first I started late, and after that I worked on a completely different project for 2 days. Here is a video of that first project.
But because the Gamejam was so long I was able to finish with a day or two to spare anyways.
In the playtesting before release I only encountered one person that didn’t notice right away that you can walk through the spikes, and they did figure it out eventually when the ground spikes in front of obstacle A became too difficult to jump over.
 When the game went live this was one of the biggest points for people to get stuck on though, I got a bunch of comments about it.
In the end most figured it out, and I only read 1 comment about actually being fully stuck on 6/10, which I assume was because they didn’t figure out that you can walk through the spikes.
But who knows how many got stuck because of this and simply didn’t comment at all.
So what I should’ve done was to make an obstacle that’s 100% unsolvable without walking through a spike.
Something like this
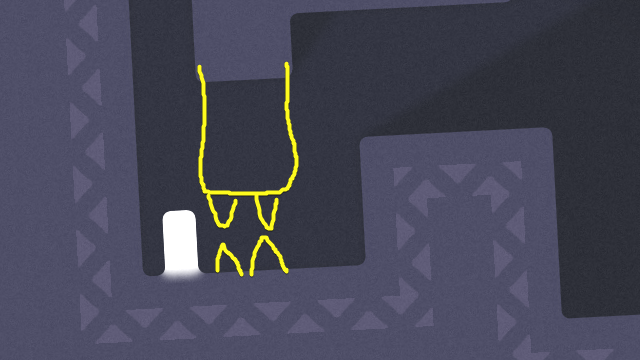 A tunnel that’s just high enough for the player to walk through without being able to jump, and then place some spikes there in a later level, this would have made it clear that you are able to walk through them.
Alright that’s all folks. Congrats, you made it! :D
Thanks for reading to the very end, I hope it was worth your time and you learned something, or were at least a little bit entertained.
You can check out my other stuff here -> Cool things from TackerTacker
and if you like what you see maybe consider following.
Have a great day, cheers.
Comments
Log in with itch.io to leave a comment.
Great devlog and really nice game!
Thank you
Nice read. By the way, at the end I enjoyed pushing a couple of balls in the hole and wait to see them come back on the other side, just to confirm myself that was as expected only one level :)