
When I discovered CSP 9 months ago, I was impressed with the game and couldn't wait for the new releases. Then I saw a post from Eldricus asking for help in either programming or rendering. As I'd briefly seen Daz before, this second option sparked my interest, however, I'd only briefly looked at the program back in 2012 and it's obviously come a long way since then. Now, it looked much more promising and something I could use for my own projects as well as CSP. And so began my descent into madness…
Now, 6 months on, I feel that I've progressed from a complete newbie, to a low-level user… perhaps I'm being a bit harsh on myself and I might be nudging into the bottom of intermediate. This then is the first warning, if you think that you're instantly going to dive in and produce a quality product like Crystal or Denise, then unless you have a lot of prior experience with Daz or other such apps, it's not going to happen. It's going to take time to learn to use the app and money to build your library. It ain't fast and it ain't cheap. It can be rewarding though, and you will be learning a valuable skill set that has applications wider than CSP, so don't let my warning put you off. Onto the general advice for opponent pack creation…
General Advice on Buying Assets.
To be able to produce quality scenes, you're going to have to spend money. The trick is to spend as little as possible and get the best quality products you can. There are plenty of freebie items out there, but don't expect good quality. They are useful for practicing with if nothing else and there are some gems, too. Elena in my Coffee Nook pack is a freebie model and she looks amazing. For value, Daz probably has the best overall standard of assets, but even they have some duds. Watch that you're buying the latest generation of products and not the old legacy stuff. You should be looking for G8 and 8.1 items. Create a wish list and wait for items to come on sale, they frequently do. Never pay full price unless you're desperate. Joining Daz+ can help as you get monthly coupons and 30% off all Daz original items, as well as free items every couple of weeks. You're not going to find the Pro bundles there, but you can get some useful items. The big pro bundle packs look daunting with their $100+ price tags, but they are good value. Again, put them on a wish list and wait for them to go on sale. They look a lot more inviting at $30 for a pack of 11 good quality items. For clothing and hair, look for DForce items, items with lots of morphs and textures. Generally, the more of these things that the item has, the better quality it will be. Sometimes an item can look promising but not work well. There are lots of outfits or scenery that look good, but have flaws. A common problem is items that are all one piece. The coffee nook scene is a good example. I love the extra furniture assets it has, the brick wall textures and so on, but the walls, floor and ceiling are all one piece. You can't just hide one wall for a camera shot. The whole room exterior disappears. You have to work around things like that. Some clothing outfits are the same. You see a jacket, shirt and skirt outfit and think it looks good, but it's all one piece. Great in some situations, but not so good for CSP when you're trying to remove a layer at a time. There are other sites, such as Renderhub and Renderosity that offer a good range of items. The quality is a little more erratic than Daz, but some excellent artist post items there, and without some of the straightlaced attitude Daz has. For instance, JMR on Renderosity has excellent clothing items with lots of morphs and textures. Find the good artists and stick with them. In general, you get what you pay for, the cheaper the item, the poorer the quality is a good rule of thumb. As with all things, buyer beware.
Scenes
Find a nice setting in which to place your opponent. The nicer it looks, the better it will feel in the end… and the more work it will be to render. Nice, pretty, and fancy all equal longer render times. Be prepared. For a low-level scene, such as the void, render times are maybe an hour or so. This is my experience and I'm using an older Intel i7 quad core 4ghz CPU, 32gb ram, and a 2gb nvidia vid card. The vid card is probably the weakest link, but this gives you a benchmark to compare with your rig. The better it is, the shorter the render times. A medium scene, such as the coffee lounge or outdoor gym will take perhaps 3-4 hours for a decent render. The Japanese room I'm currently working on is a horror… 8-10 hours. However, I've found ways to improve on that…. more on this later in Renders. So, depending on your gear, you might want to scale down your ambitions regarding the scenery. Also, the less crowded it is, the faster the renders, and the more space to pose models. And trust me, space can be crucial for a good variety of poses. Don't be afraid to use scenery in poses, the model sitting on a chair, couch, table, whatever, adds atmosphere to the scene.
Lighting
This is a subset of scenery. Good lighting can make a scene look wonderful, bad lighting is a nightmare. Generally, the less lights you use, the better. More lights mean more shadows, more weird effects, and most importantly, longer render times. There are plenty of YouTube videos that have lighting tutorials and it's well worth giving some of them a watch to get a good starting basis. Try and stick with a basic three light set up for indoors. Outdoors can be much easier. Use a single sun node, set it to the time of day you require, this is in Render Settings>Environment tab, and you're done. Easy-peasy… mostly. You might need a single extra light to brighten the front of the model depending on your sun settings. Whatever you end up deciding on, put a model in the scene and move her around. Do a few test poses and use the iRay view to get an idea of how the lighting looks. It's worth spending a few hours here to save a load of hours later when you find that some areas of your scene are lit badly. Make sure that your composite lighting is fixed in place for all the models so that the shadows match. For the main renders, I feel that as long as the shadows are consistent in that render set, then it doesn't matter quite as much if you need to play with the lighting a little for other models and their shadows are a bit different. This is my personal opinion, and others may feel differently. It is possible to light an indoor scene through windows via a sun node, but I promise you that you're going to have fun with the composite lighting when you try it. It took a lot of cheating to make my coffee nook composites work.
HDRI Domes
Useful for creating backgrounds, and you can get a free 4k starter pack of 400 HDRI's from Download Free CC BY HDRI Maps, 3D models and textures - HDRMAPS It's a great starter bundle
Models
Not really much to say here in general because it's so subjective. The best I can say is that you know what you like so go with that, unless you're making an opponent to order. What I will do is break down some of the things that affect a model.
Geoshell items
Most advice about clothes is listed in the general buying advice above. One specific thing is Geoshell items. Rather than being a separate item, like a sweater or pants, it applies a texture and shading direct on the model. Whilst this is great for skintight items like stockings and socks, the clothing applications become problematic after that. The apparent item exactly follows the contours of the model. A shirt on a female will not hang off her breasts as real clothing would, it will faithfully follow the contours of the breast shape… looking more than a little weird. The same goes for the bottom. Panties, and even pantyhose will adhere to the skin rather than stretch across the butt crack. I'm not panning Geoshell items, they can be great, but you have to be aware of their limitations. Body paint, freckles, skin blemishes, scars, water droplets are good examples where Geoshell is perfect. If you see an item labelled "easy… whatever" then beware, it's likely to be a Geoshell item. Thinks like shorts, body suits, leotards, pantyhose, panties, bras and almost any outer clothing items are not going to be good in Geoshell. Check the product description for Geoshell
Hair
It's amazing how much difference the hair makes to a model. It completely transforms her look. As per the general advice, get DForce hair with lots of morphs and adjustments. The only caveat here is that some hair is so detailed it chews up an amazing amount of memory and can make posing and rendering difficult or downright impossible. There are tips on the Daz forums on ways to mitigate this. It's complex so you'll have to look it up for yourselves.
Shaders
Shaders can be a godsend. Sometimes the clothing material provided with an asset doesn't look right or suit what you had in mind. Shaders vastly expand the possibilities. Buy set of cloth shaders. You can usually pick them up on sale for a couple of dollars a piece. Don't like that cotton effect on the dress? Replace it with a silk shader. Shaders are available for all kinds of materials, cloth, stone, metal… For a small price, they expand the versatility of your asset library.
Make up
A lot of the models will come with make up options, lipsticks, eye liners, etc.. A lot of these will not work properly when applied to other models. A LiE make up kit is a worthwhile investment. You can use it on any model without messing up their skin texture the way some of the model specific cosmetics will.
Pose packs
Can you ever have enough of these? Probably, and you can certainly make do without them and pose the model yourself, but it does save time if you have at least a good core of base pose packs to work with and then you can amend a pose from there. For those of you with deep pockets, buy all you can. That way you'll always have the option you want, or at least as near enough as makes no difference. Oh, a reset pose pack is also mighty useful, allowing you to reset an individual limb, hand or foot is great. Especially relevant when the model is posed for high heels but isn't wearing any.
Expressions
Absolutely essential. The face conveys the model's mood. Is your model sassy? Put a wink on her, or a tongue sticking out. Is she shy? have her looking shocked or embarrassed. Expressions add a whole new depth to the model, use them relentlessly. Find the ones with adjustment sliders. rather than the 'here's an expression and that's it' Sometimes a full expression can make your model look like the Joker. The sliders allow you to vary the intensity. A little shocked? A lot? It's up to you, and without risking your model looking like an extra in a bad b-movie. Also get a set with a pose expression reset option in it. Some poses come with expressions, and when you add in your own expression, the results can be unsettling. Being able to reset the expression to neutral is essential.
Props
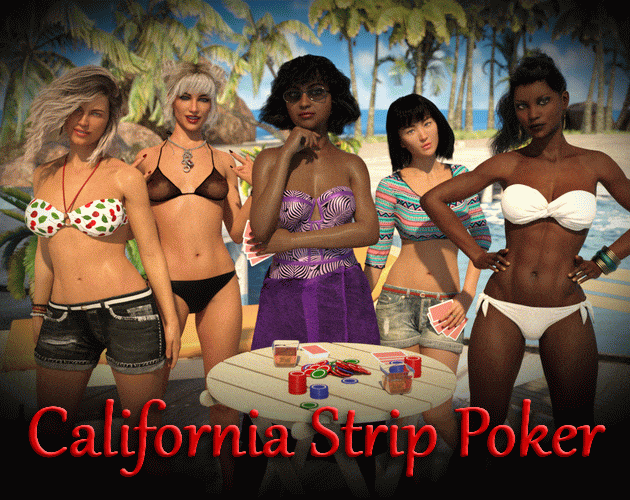
This is a matter of adding to your scene so it's back to personal choice, although the Predatron Read 'em and weep pack is probably essential for the poker table layout. Eldricus put the links to it in his post about opponent pack creation.
Anatomical Elements… or The Naughty Stuff
Daz does a good job of disguising that it sells a lot of NSFW assets and pretending it doesn't, but they are there. Almost every model Pro bundle comes with a gender appropriate Anatomical Elements asset to allow you to add basic genital shaping to your model. Whoop-di-do. At least it's better than nothing. If you really want genitals for your model, then head to Renderotica. there you will find everything you could want, and perhaps more than you could want as well. It's not a site for the faint of heart. If you're not very, very broad minded, I advise you to go in, get the essentials you need, and leave immediately. Exploring some of the content may not be good for your peace of mind. Those more adventurous can browse and be astounded/shocked/horrified by what some people want to render.
And finally… Rendering!
This is the slog. Creating an opponent with clothes, make up, etc. can take an hour or two. Setting up a scene can be done in hours, creating all the individual poses you’re your model can perhaps take 6 hours. So, you end up with perhaps 30-40 poses to render… wait for it… at an average of 3-4 hours per render. That's a lot of hours. The good news is that you don't have to be at the keyboard for this. Just set the render going and get on with your life. I would caution you to wait 10 mins, though, and check the render preview. It will be grainy, but it will allow you to check for errors in the scene, and I almost guarantee that you'll find some most times. Hand above or through the floor or clothing. I could write another 10 pages on the things that can go wrong. Better you wait ten mins and check for errors rather than check for them at the end of the render, 4 hours later. Some errors are easily fixed with a good paint program. Photoshop for those of you with cash, free apps like Krita for those of you that don't. When getting ready to render a scene, go through the elements and hide everything that doesn't appear in tor affect a scene. If that chair doesn't appear in the frame or cast a relevant shadow, hide it. It will speed up render times enormously. Walls, floors, and ceilings should never be removed, as they will drastically affect the lighting. There are also utility assets for Daz that can help as well. Scene Optimizer is one. You can use it to hide elements, but I prefer to do it manually, however, it is good for removing texture maps from all those items, such as the aforementioned walls, that you can't hide but don't appear in the frame. All of this helps render times. Whatever you do, this is still likely the most time intensive part of the project. Set renders going before you go to bed or go out to work, or on errands. You can also set them up to run sequentially. Good for saving time if you're confident that your scene is perfect.
Wash up
Well, that covers most of the basics for getting started. Like always, experience is everything. Don't be disappointed if your first efforts aren't breathtaking, be pleased that you have created a pack at all. I certainly look back on the first ChinSun and Adanne packs and think how much better they could be. Don't be afraid to ask advice. I'm open to questions and I'll do my best to answer them. Eldricus is very approachable, too. If I don't know it, then he probably does.
So, good luck and good rendering! I can't wait to see your opponent packs.